All Swimming Pools
 DIY Pool Kits
 Endless Pools
 HeatForm Panel Pool Kits
 One Piece Pools
 Above Ground Pools
 All Above Ground Swimming Pools
 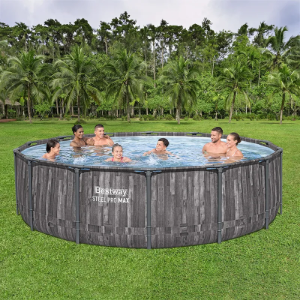 Bestway Above Ground Pools
  Steel Walled Above Ground Swimming Pools
  Wooden Above Ground Swimming Pools
 All Swim Hot Tubs
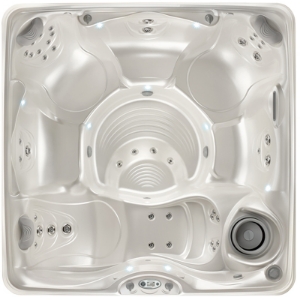
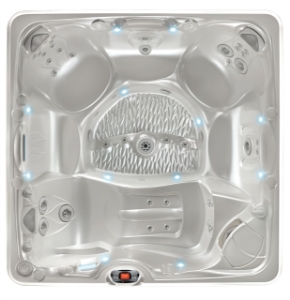
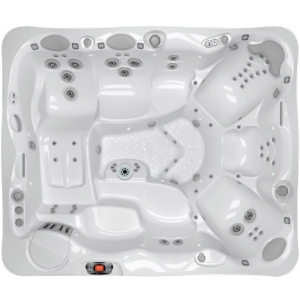
 All Hot Tubs
 **Stock Clearance Hot Tubs**
 Caldera Fantasy £3,495- £5,495
 All Caldera Hot Tubs £3,495 - £23,995
 Caldera Vacanza £6,995 - £10,995
 Caldera Paradise £10,995 - £14,995
 Caldera Utopia £13,995 - £23,995
 Swim Spas
 Ice Baths
 Pergolas And Umbrellas
 Home Spa & Steam
 Hot Tub Accessories
 Hot Tub Chemicals
 Hot Tub Chemicals
  Aquablanc Non-Chlorine System
  Aquafinesse
  Spa Frog System
  Filter Cartridges
 Caldera Hot Tub Filter Cartridges
  Cove Spas Filter Cartridges
  Catalina Hot Tub Filter Cartridges
  DreamMaker Hot Tub Filter Cartridges
  Endless Pools Swim Spa Filter Cartridges
  Eurospa Hot Tub Filter Cartridges
  Fantasy Hot Tub Filter Cartridges
  Garden Leisure Hot Tub Filter Cartridges
  Hydropool Hot Tub Filter Cartridges
  Intex Hot Tub Filter Cartridges
  Lay-Z-Spa Hot Tub Filter Cartridges
  Spaform Hot Tub Filter Cartridges
  Week End Spas Filter Cartridges
  Cleaning & Maintenance
  Replacement Hot Tub Covers
  Steps And Cover Lifters
  Hot Tub Fragrances
  Drinkware
  Hot Tub Accessories
  All Products
  Saunas & Accessories
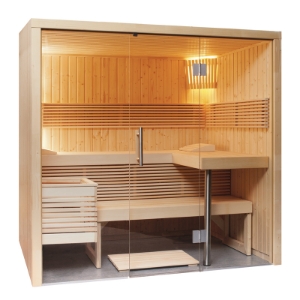 All Saunas
  Infrared Saunas
 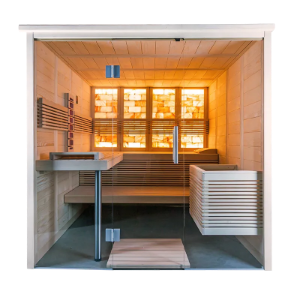 Indoor Saunas
 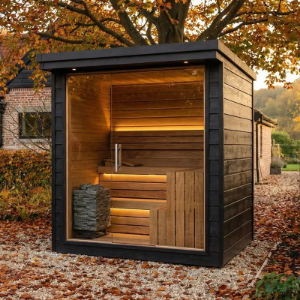 Outdoor Saunas
  Barrel Saunas
  Sauna Accessories
  Affinity Massage Tables
 All Massage Tables
  Static Couches
  Portable Massage Tables
  Motorised Massage Tables
  Massage Table Upgrade Options
  Replacement Spa Parts
 Replacement Head Rests
 Caldera Replacement Head Rests
  Replacement Jets
 Eurospa Jets
  Replacement Air Blowers
  Complete Spa Packs
  Panel Overlays and Topside Controls

 Swimming Pool Spring Opening Chemicals
 Swimming Pool Winterising Chemicals
 Chlorine Water Treatment
 Bayrol
 Non-Chlorine Water Treatment
 Water Balance
 Phosphate Removers
 Algicides, Clarifiers & Cleaners
 Lo-Chlor Speciality Chemicals
 Waterline Cleaning
 Poolside Cleaning
 Filter Cleaning
 Cover Cleaning
 Water Testing
 Dosing Systems
 Liquid Pool Covers
 Hot Tub Chemicals
 Hot Tub Chemical Starter Kits
  All Hot Tub Chemicals
  Aquasparkle
  Gold Horizons
  Aquablanc
  Aquafinesse
  Bayrol SpaTime
  Freshwater Salt System
  O2 Gentle
  Spa Frog System
  Hot Tub Fragrances
  Poolside Fun
 Aqua Fitness
  Pool Games & Inflatables
  Diving Boards & Slides
  Drinkware
  Water Fountains
  Ledge Poolside Furniture
 Above Ground Pool Accessories
 Above Ground Pool Ladders
  Above Ground Pool Liners
  Above Ground Pool Filters & Filter Cartridges
  Pool Heating & Ventilation
 Gas Boilers
  Electric Swimming Pool Heaters
  Solar Heating
  Heat Pumps
  Heat Exchangers
  Dehumidifiers & Ducted Heat Recovery Systems
  Cleaning & Maintenance
 Vacuum Equipment, Leaf Nets & Brushes
  Automatic Pool Cleaners & Spares
 Commercial Automatic Pool Cleaners
  Domestic Automatic Pool Cleaners
  Automatic Pool Cleaner Spares
  Thermometers
  Pool Repairs
  Waterline Cleaning
  Swimming Pool Liners & Underlay
 Liners
  On-Site Linings
  Underlay
  Liner Accessories
  Above Ground Pool Liners
  Step Units & Steps
 Walk In Pool Steps
  Pool Ladders
  Ladder Replacement Parts
  Above Ground Pool Ladders
  Bespoke Ladders & Handrails
  Swimming Pool Pumps
 Swimming Pool Pumps
  Pump Spares
  Swimming Pool Filters
 Pre-Filtration
  Filters
  Swimming Pool Filter Media
  Filter Cleaning
  Filter Spares
  Filter Accessories
  Replacement Filter Cartridges
  Swimming Pool Shell Fittings
 Pool Shell Fittings
  Skimmer & Main Drain Spares
  Cover Plates & Gaskets
  Above Ground Pool Skimmers
  Pipes & Fittings
 ABS Imperial Pipe & Fittings
  PVC Metric Pipe & Fittings
  Flexible Pipe & Fittings
  Valves
  Counter Current Pool Systems
 iGarden InverJet Countercurrent System
  Espa Counter Current Swim Jets
  Fluvo Counter Current System
  Endless Pools Fastlane
  Concrete Swimming Pool Finishes
 Pool Paint
  Pacelite
  Swimming Pool Mosaic Tiles
 Ardex Tanking, Tile Grout & Adhesive
  Classic Glass Tiles
  Ceramic Pool Tiles
  Graduating Fade Tiles
  Mosaic Tiles Design Motifs
  Edging Tiles
  Underwater Lights
 Swim Lane Marking Equipment

 Coping Stones
 Individual Coping Stones
  Coping Stones Kits
  Poolside Drainage
 Easy Drain Plus
  Overflow Grating
  Swimming Pool Hoists
 Poolside Safety
 Pool Alarms
  Swimming Pool Safety Fencing
 Rollaway Safety Fencing
  Swimming Pool Safety Covers
  Swimming Pool Lifesaving Equipment
  Showers & Water Features
 Solar Showers
  Water Features
  Pool Buildings
 Poolside Fun
 Aqua Fitness
  Pool Games & Inflatables
  Diving Boards & Slides
  Drinkware
  Water Fountains
  Poolside Furniture
 Primo Ceramic Grills

 Solar Covers for Outdoor Pools
 Indoor Pool Covers
 Automatic Slatted Covers
 Safety Covers
 Winter Debris Covers
 Above Ground Pool Covers
 Reel Systems & Leading Edges
 Reel Protective Covers
 Cover & Reel Replacement Parts
 Liquid Pool Covers
 Poolside Fun
 Aqua Fitness
  Pool Games & Inflatables
  Diving Boards & Slides
  Drinkware
  Water Fountains
 All Special Offers
 Pool Equipment Special Offers
 Hot Tub & Sauna Special Offers
 Chemical Special Offers
 Cover & Roller Special Offers
 Poolside & Safety Special Offers
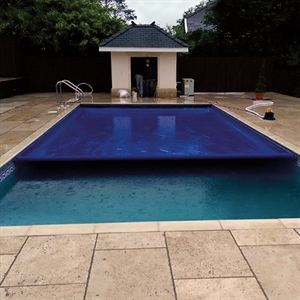
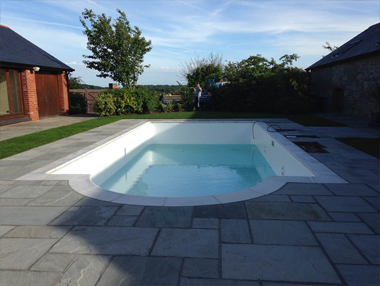
 Whether you are replacing an existing pool liner or building a new liner swimming pool, once you’ve got your new liner it’s important to follow the right steps to install it.
Pre installation notes:
- Fitting the coping stones before the liner is recommended to prevent damaging the liner once installed (with the linerlock fitted before the coping stones)
- Ensure the pool is spotlessly clean before you begin and that all gaskets on the pool fittings are in position
- A minimum outside air temperature of 10°C is required to install a liner (to ensure the liner material is pliable to stretch it into position for a wrinkle-free fit). Temperatures above 24°C should also be avoided as the material may become overly-flexible and risk stretching out of shape under its own weight.
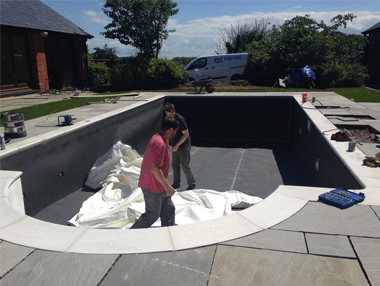
Underlay
 If you have chosen to fit a foam or felt underlay, spot the adhesive on the pool walls then fit the underlay in place. No adhesive is needed on the pool floor but cross weave tape is used over the joints.
Step by step guide: Liner instructions, how to put it in:
- Carefully unpack the liner whilst in the pool itself and check for the arrow showing the deep end of the pool. Unfold the liner carefully and locate the 4 corners beginning with the shallow end and roll out towards the deep end, unfolding the walls accordingly. Consult the full liner installation instructions before proceeding
- The beading on the liner fits into the linerlock that is found at the top of the wall (held in position because of its special shape)
- If you have or decide to hire a wet & dry vacuum cleaner with hose attachment, it will make fitting the pool liner much easier; fit the liner in the linerlock all around the pool except for a small section about 12 inches away from the deep end corner.
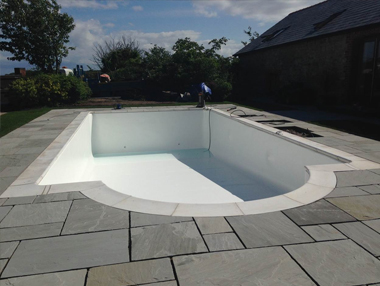 Push the suction hose down between the wall and the liner until it is approximately 1 inch (25mm) from the bottom of the wall. Make sure, if the pipework is not completed, that the ends of the pipe runs are sealed off to prevent loss of vacuum. Seal around the vacuum hose with a wet cloth or tape and the liner will be sucked to the pool walls and floor once the vacuum is switched on. Check the liner is in the correct position and if not, turn the vacuum off, adjust then restart it.
 - Start filling the pool with water once the liner is correctly positioned, leaving the vacuum running until the water covers the shallow end of the pool by at least 6 inches (150mm). The vacuum can then be removed and the remaining liner bead fitted to the linerlock.
- Check the positioning of the liner again at this stage. The liner should be bedded down with equal tightness on all 4 sides of the pool.
Pools with a deep end / main drain fitted
 Once steps 1-5 above are thoroughly checked, fill with water until there is 6-8 inches (150mm – 200mm) in the hopper – it’s recommended you anchor the 2 shallow end corners with sandbags at this stage if you are not using a vacuum.
- When the water level in the deep end reaches 1 foot (300mm) the main drain can be cut in.
- If the liner is away from the shallow end wall (a small gap at the base of the wall is acceptable; this will be pushed in by the weight of water as the pool fills), free it from the linerlock, get behind the liner and gently pull the liner to the shallow end. The liner can stretch considerably, particularly in hot weather. After gently and firmly stretching the liner, weighted sandbags should again be put in each corner to anchor them as filling with water continues (removing them when there is 6 inches (150mm) of water covering the shallow end).
- As the water reaches a level just below each of the pool wall fittings/lights etc; stop and cut them in before continuing with the filling process until the water level reaches the middle of the skimmer mouth.
- At first, the liner will probably have several packaging folds and wrinkles. These will disappear on their own if installation is done on a hot day but may need some assistance on colder days. Wait until the wrinkle is covered with 3 inches (75mm) of water then gently pull the material away from the wrinkle – once released the weight of the water will keep the liner in its wrinkle-free position.
- As the water rises, the wrinkle release process will need to be repeated as necessary in stages, but taking care and showing patience will result in a perfect liner fit. Note: if the water depth gets to 8 inches (200mm) or more over a fold or wrinkle, there will be too much weight on the liner to straighten it out and the wrinkle will be permanent.
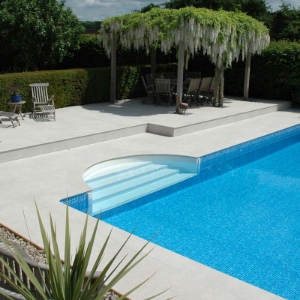
Fitting the liner with a Roman End, Square or Corner Step unit
Step Units:
 There are different types of step units but all will be supplied with a gasket and faceplate. Remove the screws around the faceplate of the step unit and take off the faceplate leaving the gasket attached to the step unit.
For Roman End or Square steps, a plank of timber or scaffolding board is placed temporarily across the top of the step unit and the liner is fitted as described above.
To prevent the liner sagging at the step unit, it is fixed to the plank with drawing pins. As the level of water reaches the first step, the liner should be firmly located around the pool and the faceplate is then fitted. Screws are inserted through the faceplate, gasket and step unit and progressively tightened in sequence. Firmly secured, the liner can now be cut away from the inside of the faceplate and removed.
Applying tape to the back of the liner and the step unit to seal the gap will improve the performance of the vacuum if used.
We hope you have found our Liner Installation Guide helpful and if you could use any further advice or support, please contact us on 02920 705059 or email sales@allswimltd.com.